
Peanut Butter Overnight Oats Meal Prep: Easy and delicious Peanut Butter Overnight Oats meal prep recipe! Creamy, high-protein overnight oats made with peanut butter are perfect for busy mornings. Healthy, make-ahead breakfast ready in minutes – great for weight loss and meal prep in the USA.
Why Peanut Butter Overnight Oats Changed My Mornings
I used to be that person who grabbed whatever was fastest on my way out the door. Pop-Tarts. Granola bars. Sometimes just coffee.
Then I discovered overnight oats with peanut butter.
Not exaggerating when I say it’s been a game-changer. The combination of creamy peanut butter with cold, soaked oats hits different. Plus, you make everything on Sunday, and you’re set for the week.
No more excuses about not having time for breakfast.
What Makes This Different From Regular Oatmeal
Here’s the thing about traditional oatmeal. You gotta cook it. You gotta stand there stirring. You gotta clean the pot afterward.
Overnight oats? None of that.
You literally dump ingredients in a jar, shake it up, and let your fridge do the work. The oats absorb the liquid overnight and soften up perfectly. No heat required.
The texture is different, too. It’s creamier, almost pudding-like. Some people find it weird at first, but most end up preferring it to hot oatmeal.
And when you add peanut butter to the mix, you get this protein-packed breakfast that actually keeps you full until lunch. Not one of those breakfasts where you’re starving again by 10 AM.
The Basic Formula You Need to Know
Before we get into fancy variations, let me break down the basic ratio. This is important because getting this wrong means your oats will be either too mushy or too dry.
The Golden Ratio:
- 1 part oats
- 2 parts liquid
- 1-2 tablespoons peanut butter
- Sweetener to taste
So if you use half a cup of oats, you need one cup of liquid. Simple math.
The liquid can be anything. Milk, almond milk, oat milk, coconut milk. Even water works, though I wouldn’t recommend it unless you’re really in a pinch.
For one serving, here’s what I typically use:
| Ingredient | Amount |
|---|---|
| Rolled oats | 1/2 cup |
| Milk of choice | 1 cup |
| Peanut butter | 2 tablespoons |
| Chia seeds | 1 tablespoon |
| Honey or maple syrup | 1 tablespoon |
| Vanilla extract | 1/4 teaspoon |
| Pinch of salt | Just a pinch |
That’s it. Mix everything together and refrigerate for at least 4 hours, but overnight is better.
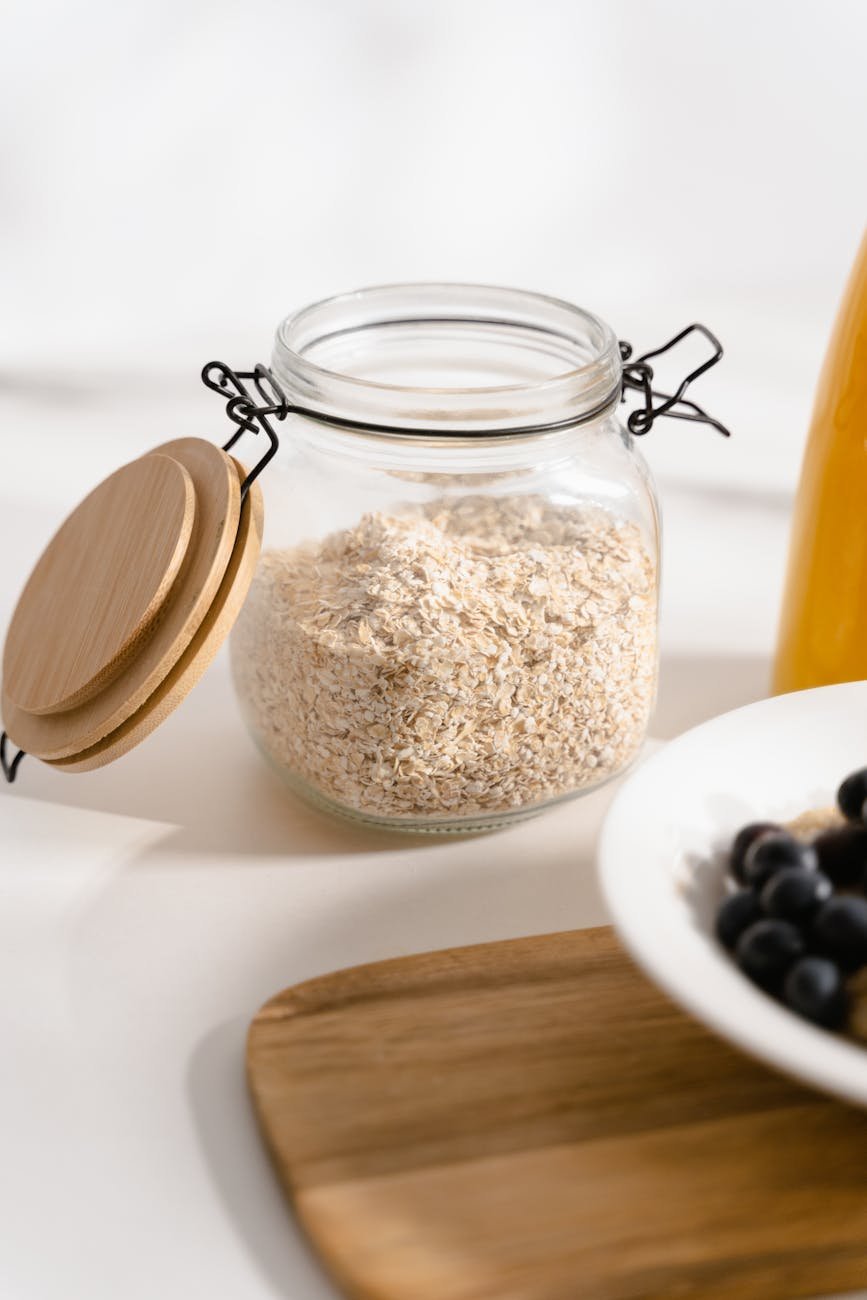
The Best Type of Oats to Use
Not all oats are created equal for this recipe.
You want rolled oats. Sometimes called old-fashioned oats. They’re the flat, disc-shaped ones that look like they’ve been squished.
Don’t use instant oats. They’ll turn into mush. They’re already too processed and will absorb way too much liquid, giving you something that resembles baby food.
Steel-cut oats won’t work either. They’re too tough and won’t soften properly without cooking. You’ll be chewing on little pebbles.
Quick oats are borderline. They’ll work in a pinch, but the texture won’t be as good as rolled oats.
Stick with rolled oats, and you’ll be happy.
Peanut Butter Selection Matters More Than You Think
I’ve tested this with every peanut butter variety I could find. Natural, processed, crunchy, smooth, fancy brands, store brands.
Here’s what I learned.
Natural peanut butter works great, but you gotta stir it really well. You know, the kind where the oil separates, and you have to mix it back in. If you don’t incorporate it properly, you’ll end up with oil slicks in your oats.
Regular processed peanut butter, like Jif or Skippy? Honestly, it mixes in more easily. It’s already emulsified, so it distributes more evenly throughout the oats. Don’t let food snobs tell you it won’t work.
Crunchy versus smooth is personal preference. I lean toward smooth because it distributes better, but crunchy adds nice texture if you’re into that.
Powdered peanut butter is an option if you’re watching calories. PB2 and similar brands have way fewer calories because they’ve removed most of the fat. The taste isn’t quite the same, but it’s a decent alternative. You’ll want to add a bit more liquid, though, since the powder absorbs moisture.
My Go-To Basic Recipe
This is the recipe I make most often. It’s simple, reliable, and tastes good every single time.
Ingredients:
- 1/2 cup rolled oats
- 1 cup unsweetened almond milk
- 2 tablespoons creamy peanut butter
- 1 tablespoon chia seeds
- 1 tablespoon pure maple syrup
- 1/4 teaspoon vanilla extract
- Tiny pinch of salt
- 1/2 sliced banana (add in the morning)
Instructions:
Grab a mason jar or any container with a lid. I prefer the 16-ounce wide-mouth mason jars because they’re easy to eat out of and easy to clean.
Add the oats first. Then the chia seeds.
Pour in the almond milk. Then add the peanut butter, maple syrup, vanilla, and salt.
Put the lid on tight and shake it like you’re making a cocktail. Shake for a good 30 seconds. This helps the peanut butter distribute evenly and prevents clumps.
Stick it in the fridge. Let it sit overnight or at least 4 hours.
In the morning, give it a stir. Add your banana slices on top. You can add other toppings too, which we’ll get into later.
That’s it. Breakfast ready.
Meal Prep Strategy for the Week
Here’s how I handle meal prep for five weekday breakfasts.
Sunday afternoon, I lined up five jars on my counter. Then I do assembly-line-style prep.
Put 1/2 cup oats in each jar. Add chia seeds to each. Pour milk into each one.
Then I measure out the peanut butter. This is where using a cookie scoop helps. A standard cookie scoop is about 2 tablespoons, so one scoop per jar.
Add sweetener and vanilla to each. Seal them all up.
Here’s the key part: shake each jar individually. Don’t skip this. Takes two minutes total and makes a huge difference in consistency.
Stack them in your fridge. They’ll keep for up to 5 days easily.
Some people ask if you can freeze them. Technically, yes, but the texture gets weird when you thaw them. The oats release extra liquid, and everything becomes watery. Not recommended.
Sneaky Pitfalls to Watch Out For
I’ve messed this up enough times to know what goes wrong.
Using too little liquid. You wake up to hard, chewy oats that haven’t absorbed enough moisture. Not pleasant. If anything, err on the slightly more liquid side.
Forgetting the salt. Sounds minor, but salt enhances all the other flavors. Without it, everything tastes flat and one-dimensional.
Not shaking it well enough. The peanut butter just sits in a blob at the bottom. You get one bite that’s all peanut butter and another that’s plain oats.
Adding fresh fruit the night before. Bananas, especially, will turn brown and mushy. Berries will bleed and make everything soggy. Always add fresh fruit right before eating.
Using expired oats. Yeah, oats can go bad. They get a stale, cardboard taste. Check the date. Store them in an airtight container.
Skipping the mix-in the morning. Even after sitting overnight, things can settle. Give it a quick stir before eating.
Nutrition Breakdown
Let’s talk numbers because people care about this stuff.
A basic serving of peanut butter overnight oats with the recipe I gave you has approximately:
| Nutrient | Amount |
|---|---|
| Calories | 380-420 |
| Protein | 12-14g |
| Carbs | 52-56g |
| Fiber | 9-11g |
| Fat | 14-16g |
| Sugar | 16-18g |
These numbers vary depending on the milk you use and the amount of sweetener you add.
Want to reduce calories? Use unsweetened almond milk instead of whole milk. That saves you about 100 calories right there. Use powdered peanut butter instead of regular. Another 100 calories saved.
Want more protein? Add a scoop of protein powder or Greek yogurt. You can easily get up to 25-30 grams of protein per serving.
The fiber content is genuinely impressive. Between the oats and chia seeds, you’re getting a solid chunk of your daily fiber needs. This is why overnight oats keep you full for hours.
Flavor Variations That’ll Keep You From Getting Bored
Eating the same thing every day gets old fast. Here are variations I rotate through.
Chocolate Peanut Butter:
Add 1-2 tablespoons of cocoa powder and an extra teaspoon of sweetener. Tastes like a Reese’s cup. In the best way.
Apple Cinnamon PB:
Mix in 1 teaspoon cinnamon, 1/4 teaspoon nutmeg, and add diced apples in the morning. Drizzle with extra peanut butter.
Banana Bread:
Mash half a banana into the mixture before refrigerating. Add walnuts and cinnamon. The mashed banana acts as a natural sweetener, so you can reduce the maple syrup.
Elvis Style:
Peanut butter, banana, and a handful of mini chocolate chips. Add crispy bacon bits if you’re feeling adventurous. Sweet and salty heaven.
Berry PB:
Use berry-flavored yogurt as part of your liquid. Top with fresh berries and a drizzle of peanut butter in the morning.
Pumpkin Spice PB:
Mix in 3 tablespoons of pumpkin puree, pumpkin pie spice, and a bit of brown sugar. Very fall vibes.
Coffee PB:
Use cold brew coffee as half of your liquid. Adds a nice caffeine kick and complements peanut butter surprisingly well.
Storage Tips That Actually Matter
Mason jars are great, but any container with a tight-fitting lid works. I’ve used Tupperware, glass meal prep containers, and even cleaned out yogurt containers in desperate times.
Whatever you use, make sure it seals well. You don’t want your oats absorbing fridge odors. Nobody wants overnight oats that taste like last night’s garlic chicken.
Store them in the back of your fridge where the temperature is most consistent. Not in the door. The door gets opened a million times, and the temperature fluctuates.
Label them with dates if you’re making a big batch. After day 5, the texture starts to deteriorate a bit. Still safe to eat, just not as good.
Can you take them to work? Absolutely. They’re portable. Just keep them cold. If you don’t have a fridge at work, use an insulated lunch bag with an ice pack.
RELATED POST >> Easy Family Meal Prep Ideas for a Family of 4 Without Chaos
The Toppings Game
This is where you can get creative and make each day feel different, even with the same base recipe.
Crunchy toppings:
- Granola
- Chopped nuts (almonds, pecans, walnuts)
- Seeds (pumpkin, sunflower)
- Coconut flakes
- Cacao nibs
Fresh additions:
- Sliced bananas
- Berries (strawberries, blueberries, raspberries)
- Diced apples
- Sliced peaches
- Pomegranate seeds
Drizzles and extras:
- Extra peanut butter
- Almond butter
- Honey
- Maple syrup
- Dark chocolate chips
- Mini M&Ms (no judgment here)
Add crunchy toppings right before eating. If you add them the night before, they get soggy and lose their appeal.
Why This Works for Actual Meal Prep
The beauty of this recipe is that it scales perfectly.
Making one serving? Easy.
Making ten servings? Literally the same process, just more jars.
The ingredients are shelf-stable (except the milk). You can stock up when things go on sale. Oats last forever. Peanut butter lasts months.
There’s minimal cleanup. You’re not using multiple bowls and measuring cups. Everything goes straight into the jar.
And here’s something people don’t think about: it reduces decision fatigue. You don’t have to think about breakfast every morning. It’s already made. One less decision in your day.
For busy parents, this is clutch. Get your kids involved in the prep on Sunday. Even young kids can help measure and pour. They’re more likely to eat breakfast if they helped make it.
Troubleshooting Texture Issues
The texture of overnight oats is subjective. Some love it. Some need time to adjust.
Too thick? Add more liquid. You can thin them out in the morning with a splash of milk.
Too thin? Add more oats or chia seeds next time. Chia seeds, especially, will thicken things up.
Too mushy? You might be using instant oats by mistake. Or you’re letting them sit too long. Try reducing the soak time.
Too chewy? You need more liquid or more time. Let them soak longer, maybe 8-12 hours instead of just overnight.
Don’t like cold oats? You can microwave them for 60-90 seconds. They won’t be the same as traditional oatmeal, but they’ll be warm. Add a splash of milk before microwaving.
Budget-Friendly Meal Prep
This breakfast is stupid cheap when you break it down per serving.
A container of oats costs about $3-4 and yields 10-12 servings. That’s like 30 cents per serving.
Peanut butter? A jar costs around $3-5 and lasts for weeks. Maybe 25 cents per serving.
Chia seeds are the priciest ingredient, but they last forever. You’re looking at maybe 20 cents per serving.
Milk depends on the type you buy, but let’s say 50 cents per serving.
Total cost per serving: around $1.25- $ 1.50.
Compare that to grabbing breakfast at a drive-through or coffee shop. You’re saving serious money over time.
Buy in bulk when possible. Store-brand items work just as well as name brands in this recipe. I’ve blind taste-tested and honestly can’t tell the difference.
Making It Work for Different Diets
This recipe is ridiculously adaptable for different dietary needs.
Vegan: Use plant-based milk and maple syrup instead of honey. Most peanut butter is already vegan, but check labels.
Gluten-free: Make sure your oats are certified gluten-free. Oats are naturally gluten-free, but often processed in facilities that handle wheat.
Dairy-free: Use any non-dairy milk. Problem solved.
Low-sugar: Skip the sweetener or use stevia. The peanut butter and vanilla provide enough flavor.
High-protein: Add protein powder, Greek yogurt, or extra peanut butter. You can easily hit 25-30g of protein.
Keto: This won’t work as-is because oats are high-carb. But you can make “noatmeal” with hemp hearts and chia seeds instead. Different recipe entirely, though.
The Chia Seed Secret
I always add chia seeds, and here’s why.
They’re loaded with omega-3s, fiber, and protein. They make the oats thicker and creamier. They keep you fuller longer.
But here’s the secret benefit: they prevent that weird layer of liquid that sometimes forms on top of overnight oats. Chia seeds absorb excess moisture and keep everything evenly textured.
One tablespoon is enough. More than that, and it becomes too thick, almost gelatinous.
Don’t have chia seeds? Flax seeds work similarly. Grind them first for better absorption.
Common Questions People Actually Ask
Do you eat overnight oats cold?
Most people do, but you don’t have to. You can warm them up if that’s your preference. I eat them cold straight from the fridge.
How long do they last?
Up to 5 days in the fridge. After that, the texture starts getting weird, and you risk spoilage.
Can kids eat these?
Definitely. Kids actually tend to love the sweet, creamy texture. Just watch out for peanut allergies, obviously.
Do overnight oats need to be in a jar?
Nope. Any container works. Jars are just convenient and Instagram-worthy.
Can I use water instead of milk?
You can, but it won’t taste as good. The milk adds creaminess and flavor. If you must use water, add extra peanut butter to compensate.
Why are my overnight oats slimy?
Usually from too many chia seeds or flax seeds. Cut back on those. Could also be from using instant oats.
Can I make them dairy-free?
Yes. Use any plant-based milk. Almond, oat, soy, and coconut all work great.
Converting People Who Think They Hate Oatmeal
I’ve turned several oatmeal haters into overnight oats fans.
The trick is starting with flavors they already love. If someone loves peanut butter cups, make the chocolate peanut butter version. If they love cinnamon rolls, do the cinnamon apple version.
Let them customize it. Give them control over the toppings. Make it feel less like health food and more like dessert for breakfast.
The texture being different from hot oatmeal helps. A lot of people who hate mushy hot oatmeal actually like the firmer, creamier texture of overnight oats.
Start with a sweeter version to hook them, then gradually reduce the sweetener over time. Before they know it, they’re eating a healthy breakfast and enjoying it.
My Biggest Lesson After Two Years of Making These
Consistency beats perfection.
I used to stress about making everything perfect. Exact measurements. Perfect ratios. Fancy toppings.
Honestly? Just getting something made and in the fridge is what matters.
Some weeks, my overnight oats are beautiful and Pinterest-worthy. Other weeks, they’re thrown together in 3 minutes with whatever I have on hand.
Both versions get eaten. Both versions fuel my morning.
The point is having a healthy breakfast ready to go. Not winning a food photography contest.
The Comparison to Store-Bought Alternatives
You can buy premade overnight oats now. Starbucks has them. Grocery stores stock them in the refrigerated section.
They’re convenient, sure. But they’re also expensive ($3-5 per serving) and often loaded with sugar.
Making your own costs a fraction of the price, and you control exactly what goes in.
Plus, store-bought versions use preservatives to extend shelf life. Not necessarily bad for you, but not necessary when you’re making fresh batches weekly.
The portion sizes on store-bought are usually smaller, too. You’re paying more for less food.
Peanut Butter Overnight Oats Meal Prep: Weekend Brunch Twist
Sometimes on weekends, I turn this into something fancier.
Make the basic recipe, but use it as a base for a breakfast bowl. Top it with:
- Sliced fruit arranged nicely
- A dollop of Greek yogurt
- Drizzle of peanut butter
- Sprinkle of granola
- Dusting of cinnamon
Serve it in a nice bowl instead of eating from the jar. Suddenly, it feels like a restaurant-quality breakfast.
You can even layer it parfait-style in a clear glass. Oats on the bottom, yogurt in the middle, fruit and granola on top. Very brunch-worthy.
Final Thoughts on Making This Habit Stick
Start with just two or three jars for the week. Don’t overwhelm yourself trying to prep seven days’ worth on your first try.
Pick one or two flavors you know you’ll like. Don’t experiment with weird combinations until you’ve got the basics down.
Set a reminder on your phone for Sunday afternoon. Make it part of your weekly routine, like grocery shopping or laundry.
If you mess up a batch, learn from it and move on. I’ve dumped entire jars down the drain because I screwed up the ratios. It happens.
Keep it simple at first. The fancy variations come later once this becomes automatic.
And remember: even a mediocre homemade breakfast is better than no breakfast or expensive fast food.
This isn’t about being perfect. It’s about being prepared.
Frequently Asked Questions
Can I use steel-cut oats for overnight oats?
No, steel-cut oats won’t soften properly without cooking. They’ll stay too tough and chewy. Stick with rolled oats for the best results.
How much peanut butter should I add to overnight oats?
Two tablespoons is the sweet spot for most people. It’s enough to give good flavor and creaminess without being overwhelming. You can adjust based on preference.
Do overnight oats help with weight loss?
They can be part of a weight loss plan because they’re filling and portion-controlled. The fiber and protein keep you satisfied. But they’re not magic. Calories still matter.
Can I prep overnight oats for a whole month?
Not recommended. They last up to 5 days in the fridge. Beyond that, texture and freshness deteriorate. Stick to weekly batches.
What’s the best milk for overnight oats?
Personal preference matters here. Whole milk makes them creamier. Almond milk is lower in calories. Oat milk has a nice flavor. All works fine.
Can I add protein powder to overnight oats?
Absolutely. Add it to the dry ingredients and shake well. You might need slightly more liquid. Chocolate or vanilla protein powders work best with peanut butter.
Why are my overnight oats watery?
Either too much liquid, not enough oats, or insufficient soak time. Chia seeds help absorb excess liquid. Try reducing the liquid by 1/4 cup next time.
Are overnight oats healthier than cooked oatmeal?
Nutritionally, they’re similar. Overnight oats retain slightly more nutrients since there’s no heat involved. But the difference is minimal. Both are healthy choices.
Can I use crunchy peanut butter?
Yes, it works fine. The texture will be slightly different with peanut chunks throughout. Some people prefer it. Mix it in well so it distributes evenly.
Do I have to use mason jars?
No. Any container with a lid works. Mason jars are popular because they’re the right size and easy to eat from, but use whatever you have.
SUGGESTED POST >> Meal Prep Grocery List Template: Unique Smart Shopping Guide