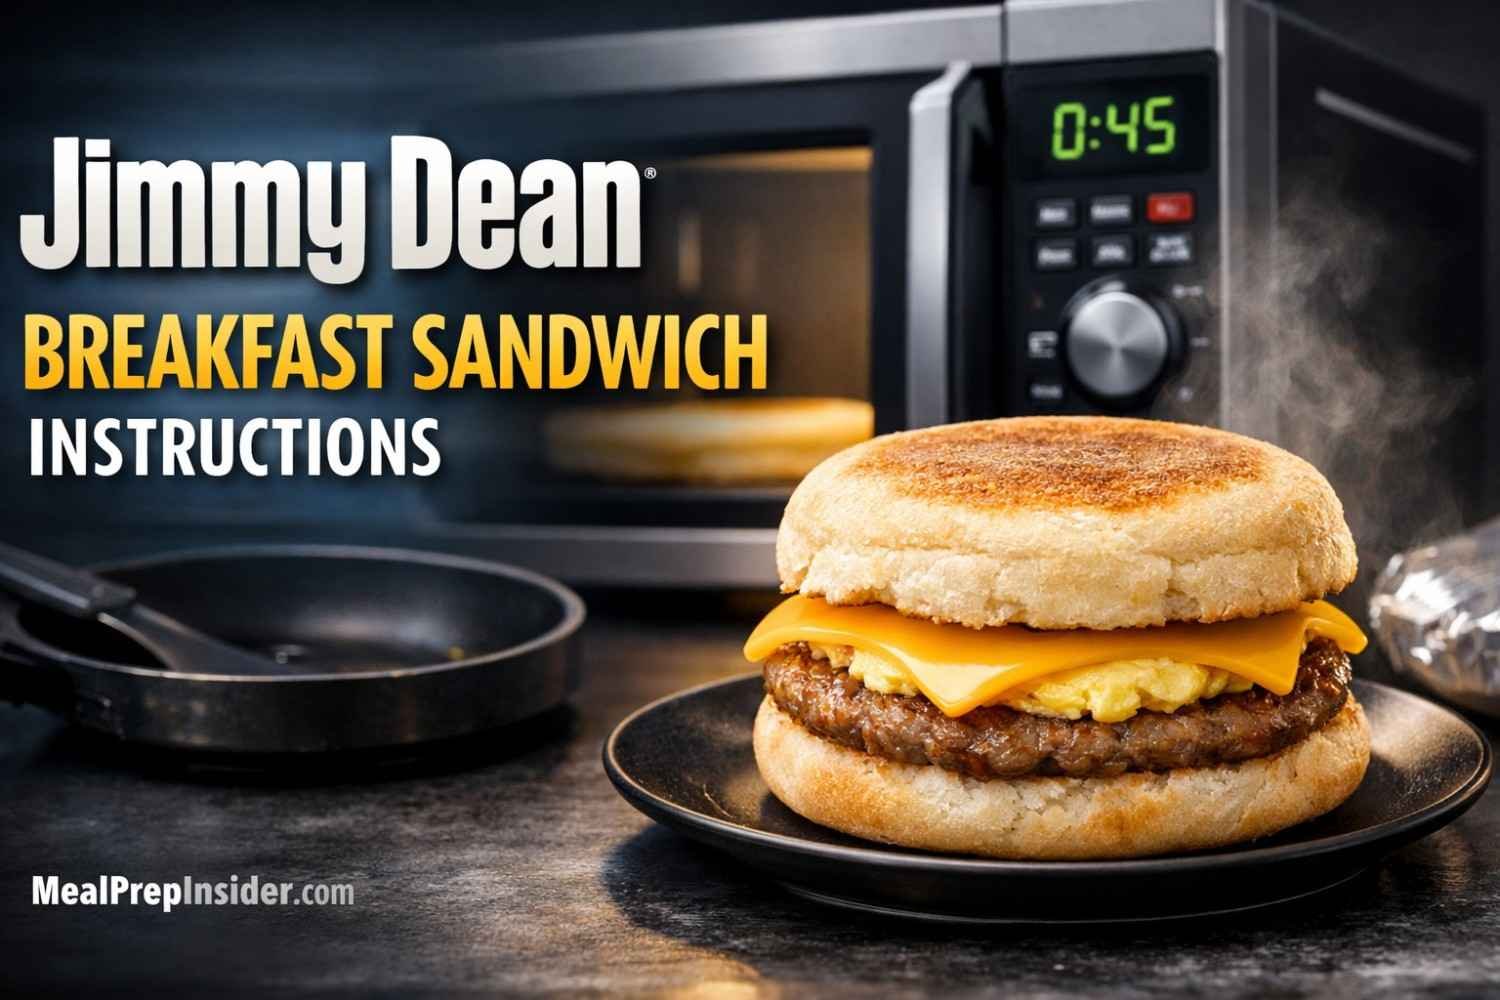
Fast Jimmy Dean Breakfast Sandwich Instructions: Real Steps
Jimmy Dean breakfast sandwich instructions might seem straightforward, but there’s an art to getting that golden, crispy exterior with a perfectly heated center that doesn’t turn into a rubbery mess.
You’ve probably stood in your kitchen at 6 AM, staring at that frozen sandwich, wondering if you should microwave it or risk being late for work by trying something different.
Here’s the thing most people don’t realize.
Those instructions on the wrapper? They’re just a starting point. The difference between a mediocre breakfast and something that rivals your favorite fast-food joint comes down to technique, timing, and a few tricks the packaging won’t tell you.
This guide breaks down everything you need to know about preparing Jimmy Dean breakfast sandwiches the right way. We’re talking multiple cooking methods, customization options, troubleshooting tips, and even hacks that’ll make you wonder why you ever settled for soggy bread and cold centers.
Let’s get into it.
What Makes Jimmy Dean Breakfast Sandwiches Different
Jimmy Dean has dominated the frozen breakfast game for decades, and there’s a reason these sandwiches remain pantry staples across American households. The brand offers a variety that other frozen breakfast options can’t match.
You’ve got croissants, biscuits, English muffins, and flatbreads. Sausage, bacon, or turkey variations. Egg and cheese combinations that cater to different preferences.
But here’s what matters most: the ingredients are designed to reheat well when you follow proper preparation methods. The keyword there is “proper.”
Most people wing it. They toss the sandwich in the microwave for whatever time feels right, then wonder why half of it is lava-hot while the other half is still frozen.
That ends today.
Basic Microwave Instructions for Jimmy Dean Sandwiches
Let’s start with the most common method, since about 80% of people prepare these sandwiches in the microwave. The basic process involves four simple steps that take less than three minutes.
The Standard Microwave Method:
- Remove the sandwich from its plastic wrapper
- Wrap it in a paper towel
- Microwave on defrost or 50% power for 1 minute
- Flip the sandwich over
- Microwave on high for 50-65 seconds (regular microwave) or 1 minute to 1 minute 30 seconds (lower wattage microwave)
- Let it stand for 1 minute before eating
That standing time isn’t optional. The residual heat continues cooking the sandwich and distributes warmth evenly throughout.
Skip it, and you’ll bite into temperature extremes that’ll either burn your mouth or leave you chewing cold egg.
The paper towel serves a specific purpose beyond just keeping your microwave clean. It absorbs excess moisture while allowing steam to escape, preventing that dreaded soggy bread situation that ruins an otherwise decent breakfast.
Why Wattage Matters More Than You Think
Your microwave’s wattage dramatically affects cooking time, yet most people ignore this variable completely. A 1200-watt microwave cooks significantly faster than an 800-watt model.
Check the inside of your microwave door or the back of the unit for wattage information. This number determines whether you need to adjust the recommended cooking times.
Wattage Adjustment Guide:
| Microwave Wattage | Defrost Time | High Power Time | Total Time |
|---|---|---|---|
| 1200+ watts | 1 minute | 50-55 seconds | ~2 minutes |
| 1000-1199 watts | 1 minute | 55-65 seconds | ~2:15 minutes |
| 800-999 watts | 1 minute 15 seconds | 1 minute 15 seconds | ~2:45 minutes |
| Below 800 watts | 1 minute 30 seconds | 1 minute 30 seconds | ~3:15 minutes |
Lower wattage microwaves require longer cooking times and more patience. Rushing the process in a weaker microwave guarantees an unevenly heated sandwich.
Higher wattage units cook faster but also increase the risk of overcooking, which turns the bread hard and makes the egg rubbery.
Finding your microwave’s sweet spot takes experimentation, but the wattage chart gives you a solid starting point.
The Oven Method for Superior Results
Microwaves offer convenience. Ovens deliver quality.
When you’ve got an extra ten minutes and want a breakfast sandwich that tastes restaurant-quality, the oven method outperforms microwave preparation in every category that matters.
Oven Preparation Steps:
- Preheat your oven to 350°F
- Remove the sandwich from all plastic packaging
- Wrap it in aluminum foil
- Place it on a baking sheet
- Bake for 20-25 minutes
- Carefully unwrap and check the internal temperature
- Let it stand for 2 minutes before eating
The aluminum foil traps moisture and heat, creating a mini steam environment that heats the sandwich evenly without drying it out. The longer cooking time allows flavors to meld together in ways the microwave simply can’t replicate.
You’ll notice the difference immediately. The bread has actual texture. The cheese melts completely. The egg and meat heat through without developing weird rubbery spots.
The downside? Time. Twenty-five minutes feels like an eternity on a busy Tuesday morning.
That’s where meal prep comes in, but we’ll get to that strategy later.
Air Fryer Instructions That’ll Change Your Breakfast Game
Air fryers have revolutionized frozen food preparation, and Jimmy Dean breakfast sandwiches are no exception. This method delivers the speed of a microwave with results closer to oven quality.
Air Fryer Method:
- Remove the sandwich from the plastic wrapper
- Separate the sandwich components (top bread, egg/meat/cheese, bottom bread)
- Place components in the air fryer basket
- Set the temperature to 350°F
- Cook for 8-10 minutes
- Reassemble the sandwich
- Let rest for 1 minute
Why separate the components? Different parts of the sandwich heat at different rates. The bread toasts faster than the frozen egg and meat patty needs to heat through.
Cooking everything together in an air fryer often results in burnt bread and a still-cold center. Separating components lets you pull the bread out earlier if needed while giving the protein elements time to heat properly.
The texture you get from air frying is unmatched. Crispy edges. Melted cheese. Evenly heated fillings. It’s the closest you’ll get to a fresh-made sandwich without firing up a full kitchen operation.
Toaster Oven: The Underrated Middle Ground
Don’t sleep on the toaster oven method. It combines reasonable speed with quality results, making it perfect for people who want better than microwave quality without committing to a full oven preheat.
Toaster Oven Instructions:
- Set toaster oven to 350°F
- Remove the sandwich from the wrapper
- Wrap in aluminum foil
- Place on toaster oven tray
- Heat for 15-18 minutes
- Unwrap carefully
- Allow 1-2 minutes standing time
Toaster ovens heat up faster than conventional ovens, shaving about five minutes off the total process. They also use less energy, which matters if you’re cooking a single sandwich.
The smaller cooking chamber means heat circulates more efficiently, often producing more consistent results than a large oven where the sandwich sits in a vast space.
Grilling Method for Weekend Breakfast Enthusiasts
Here’s a method most people never consider: grilling your Jimmy Dean breakfast sandwich. It sounds excessive until you try it and realize you’ve unlocked a whole new dimension of breakfast sandwich potential.
Grill Preparation:
- Preheat grill to medium heat (around 350°F)
- Thaw the sandwich in the refrigerator overnight
- Remove from wrapper
- Brush both sides lightly with melted butter
- Wrap in heavy-duty aluminum foil
- Place on the grill away from direct heat
- Heat for 10-12 minutes, flipping halfway through
- Unwrap and place directly on the grill for 30 seconds per side
- Remove and let rest 1 minute
The grill adds subtle smoky notes you won’t get from any indoor cooking method. That final 30-second sear on each side creates textural contrast that elevates the entire experience.
This method works brilliantly when you’re already grilling for a weekend brunch or camping trip. Toss a few sandwiches on the grill while cooking other items.
The overnight thaw is crucial here. Putting a frozen sandwich on the grill creates uneven heating and increases the risk of burning the outside while leaving the inside cold.
Stovetop Pan Method for Maximum Control
The stovetop method gives you more control than almost any other preparation technique. You can adjust the heat in real-time, check progress easily, and make modifications on the fly.
Skillet Instructions:
- Thaw the sandwich in the microwave on defrost for 1 minute
- Heat a non-stick skillet over medium-low heat
- Add a small amount of butter or cooking spray
- Place the sandwich in the pan
- Cover with a lid
- Cook for 3-4 minutes
- Flip sandwich
- Cover and cook another 3-4 minutes
- Check internal temperature
- Remove and rest 1 minute
The covered pan creates a steam environment similar to the oven foil method, but with better temperature control. You can lift the lid, check progress, and adjust the heat as needed.
Medium-low heat is essential. Higher temperatures brown the outside too quickly before the inside heats through. Lower temperatures extend cooking time unnecessarily and can dry out the sandwich.
The partial thaw before pan cooking ensures more even heating. Starting with a completely frozen sandwich in a pan usually results in burnt bread and a cold center.
Understanding Internal Temperature for Food Safety
Food safety isn’t the most exciting topic, but it matters when you’re reheating meat and egg products. The USDA recommends reheating precooked foods to an internal temperature of 165°F.
Most people don’t check this temperature, relying instead on touch, appearance, or simply following the package timing. That works most of the time, but understanding proper internal temperature ensures both safety and quality.
Temperature Checkpoints:
- Use an instant-read thermometer
- Insert into the center of the sandwich
- Avoid touching the bread (it gives false readings)
- Target 165°F throughout
- If under temperature, heat in 15-second intervals until reached
Overheating beyond 165°F doesn’t make the sandwich safer, but it does degrade quality. Eggs become rubbery. Cheese separates. Bread dries out.
Finding that sweet spot where the sandwich hits 165°F without overshooting takes attention, but it’s worth the effort for consistent results.
Frequent Errors People Make When Preparing These Sandwiches
Let’s address the preparation mistakes that ruin otherwise good breakfast sandwiches. These errors are incredibly common and completely avoidable.
Mistake #1: Skipping the Paper Towel
Microwaving without a paper towel wrapper leads to moisture buildup that makes the bread soggy. The paper towel absorbs excess steam while still allowing even heating.
Mistake #2: Using Full Power Immediately
Blasting a frozen sandwich on high power from the start creates extreme temperature variations. The outside gets nuclear while the inside stays frozen.
Mistake #3: Ignoring Standing Time
Eating immediately after cooking means missing out on residual heat distribution. The standing period matters more than most people realize.
Mistake #4: Not Removing Plastic Wrapper
This seems obvious, but surprisingly many people forget in their morning rush. Melted plastic ruins breakfast and potentially creates health hazards.
Mistake #5: Overcrowding the Cooking Surface
Whether you’re using a microwave, oven, or air fryer, sandwiches need space for heat circulation. Stacking or crowding leads to uneven cooking.
Mistake #6: Using Damaged or Thawed-Then-Refrozen Sandwiches
Power outages happen. Freezers malfunction. Sandwiches that have completely thawed and been refrozen develop ice crystals that affect texture and make even heating nearly impossible.
Mistake #7: Forgetting to Adjust for Sandwich Variety
A biscuit sandwich heats differently from a croissant sandwich. Flatbread versions need less time than thicker English muffin options. The package instructions give general guidance, but sandwich type matters.
Customization Ideas to Upgrade Your Sandwich
Jimmy Dean sandwiches taste fine straight from the package, but a few additions transform them from acceptable to exceptional.
Enhancement Options:
- Add fresh avocado slices after heating
- Top with hot sauce, sriracha, or your preferred condiment
- Include a hash brown patty for extra substance
- Add fresh spinach or arugula for nutrition
- Melt additional cheese on top during the final heating stage
- Include sliced tomato after cooking
- Add crispy bacon strips, even if the sandwich already contains sausage
The key with customizations is adding them after cooking rather than before. Fresh ingredients added before heating often become soggy or overcooked.
Temperature-sensitive additions like avocado or fresh greens should go on after the sandwich has cooled slightly from cooking. This prevents wilting and maintains textural contrast.
Condiments work best when applied to the bread rather than directly on the egg or meat. This creates better distribution and prevents the toppings from sliding around.
Meal Prep Strategy for Busy Weekday Mornings
Here’s a game-changing strategy: prepare multiple sandwiches at once using the oven method, then reheat individual portions throughout the week.
Batch Preparation Process:
- Preheat oven to 350°F
- Remove 5-7 sandwiches from the packaging
- Wrap each individually in aluminum foil
- Place on a baking sheet
- Bake for 20-25 minutes
- Let cool completely
- Rewrap in fresh foil or transfer to containers
- Refrigerate for up to 3 days
When you want breakfast, grab a refrigerated sandwich and microwave it for 45-60 seconds. Since it’s already cooked and just needs reheating, you get oven-quality results with microwave speed.
This method works brilliantly for meal preppers who dedicate Sunday evenings to weekly food preparation. Twenty-five minutes yields five breakfast solutions.
The sandwiches maintain quality better when refrigerated after oven cooking than they would if frozen, thawed, and reheated multiple times.
Storage and Shelf Life Considerations
Proper storage extends the life and maintains the quality of your Jimmy Dean breakfast sandwiches. These guidelines help you avoid waste and ensure food safety.
Freezer Storage Best Practices:
- Keep sandwiches at 0°F or below
- Store in original packaging until ready to use
- Don’t refreeze sandwiches that have completely thawed
- Use within the date stamped on the package
- Keep away from the freezer door, where the temperature fluctuates
Refrigerated Storage (After Cooking):
- Store cooked sandwiches in airtight containers
- Consume within 3-4 days
- Keep refrigerator at 40°F or below
- Label containers with the preparation date
Freezer burn affects quality but not safety. Those white, dried-out spots on sandwiches that have been frozen too long indicate moisture loss. The sandwich is still safe to eat, but texture and flavor suffer.
If you notice significant freezer burn, consider using those sandwiches in a breakfast casserole or scramble where texture matters less.
Nutritional Information Breakdown
Understanding what you’re eating helps you make informed decisions about incorporating these sandwiches into your diet.
Typical Nutritional Profile (Sausage, Egg & Cheese Biscuit):
| Nutrient | Amount per Sandwich |
|---|---|
| Calories | 410-460 |
| Total Fat | 28-32g |
| Saturated Fat | 11-13g |
| Cholesterol | 155-175mg |
| Sodium | 880-950mg |
| Carbohydrates | 29-33g |
| Protein | 15-18g |
Different varieties offer different nutritional profiles. Turkey sausage versions typically contain less fat and fewer calories than regular pork sausage options. Croissant sandwiches usually have higher fat content than English muffin varieties.
The sodium content is worth noting. At nearly 1000mg per sandwich, you’re getting about 40% of the recommended daily sodium intake from breakfast alone. People watching sodium should consider this when planning other meals.
Protein content is respectable at 15-18 grams, which helps with satiety and can keep you feeling full until lunch.
Cost Analysis: Are They Worth It?
Let’s talk economics. Jimmy Dean breakfast sandwiches typically cost between $2.50 and $4.00 per sandwich, depending on variety and where you shop.
Price Comparison:
- Fast food breakfast sandwich: $3.50-$5.00
- Homemade from scratch: $1.50-$2.00 in ingredients
- Competitor frozen brands: $2.00-$3.50
- Jimmy Dean: $2.50-$4.00
The convenience factor tips the scale. Making breakfast sandwiches from scratch saves money but requires time, energy, and multiple ingredients.
Fast food offers comparable convenience but costs more and requires leaving your house.
Competitor brands often match Jimmy Dean’s price point, making the decision more about brand preference and taste than pure economics.
Bulk purchasing at warehouse stores like Costco or Sam’s Club significantly reduces per-sandwich cost, sometimes dropping to $2.00 or less per unit.
RELATED POST >> 33+ Easy Toddler Breakfast Ideas: Quick, Healthy, and Fun
Comparing Different Jimmy Dean Varieties
The brand offers enough variety to prevent breakfast boredom, but not all sandwiches are created equal in terms of taste, texture, or preparation.
Popular Varieties Ranked by Preparation Ease:
- English Muffin Sandwiches – Heat most evenly, most forgiving timing
- Biscuit Sandwiches – Second most consistent results
- Croissant Sandwiches – Require careful attention to prevent drying
- Flatbread/Croissant Crust – Most finicky, easiest to overcook
Biscuit versions tend to be most forgiving with timing errors. The denser bread texture doesn’t dry out as easily as croissants or flatbreads.
English muffin sandwiches heat the most evenly due to their uniform thickness and composition.
Croissant varieties taste amazing when prepared properly, but turn into dry, flaky disasters when overheated by even 15-20 seconds.
The meat filling affects preparation, too. Turkey sausage heats faster than pork sausage. Bacon varieties cook more quickly than sausage options.
Troubleshooting Guide for Perfect Results
When things go wrong, these solutions get you back on track.
Problem: Cold Center, Hot Edges
Solution: Use defrost or 50% power for longer before switching to high power. The gradual heating prevents edge overcooking while the center catches up.
Problem: Soggy Bread
Solution: Always use a paper towel when microwaving. For oven methods, ensure foil isn’t sealed too tightly, which traps too much moisture.
Problem: Rubbery Egg Texture
Solution: You’ve overcooked it. Reduce heating time by 10-15 seconds on the next attempt. Remember that standing time continues the cooking process.
Problem: Cheese Isn’t Melted
Solution: The standing time helps cheese melt with residual heat. If the cheese still isn’t melted, add 10-15 seconds of additional heating.
Problem: Dry, Hard Bread
Solution: You’ve cooked it too long or at too high a temperature. For microwaves, ensure you’re using the correct power settings. For ovens, verify temperature accuracy with an oven thermometer.
Problem: Uneven Heating
Solution: Flip the sandwich halfway through cooking time, regardless of method. Ensure your microwave turntable rotates properly.
The Environmental Consideration
Packaging waste is a legitimate concern with frozen convenience foods. Each Jimmy Dean sandwich comes individually wrapped in plastic, then boxed with multiple sandwiches per package.
From an environmental standpoint, making breakfast sandwiches from scratch with bulk ingredients produces less waste. Reusable containers, minimal packaging, and composting egg shells reduce environmental impact significantly.
That said, food waste matters too. Frozen sandwiches with long shelf lives can actually reduce waste compared to buying fresh ingredients that spoil before you use them.
The energy consumption of keeping items frozen versus refrigerating fresh ingredients roughly evens out over time.
There’s no perfect answer here. Environmental impact involves trade-offs between convenience, waste reduction, energy use, and food spoilage prevention.
Pairing Suggestions for Complete Breakfasts
A breakfast sandwich can stand alone, but pairing it with complementary items creates a more balanced, satisfying meal.
Ideal Pairings:
- Fresh fruit like berries, apple slices, or orange segments
- Greek yogurt for additional protein
- Hash browns or tater tots for extra substance
- Fresh vegetable juice or smoothie for nutrition
- Coffee or tea (obviously)
- Small side salad for lunch-sized breakfast
The sandwich provides protein, carbs, and fat, but lacks fresh vegetables and fruits. Adding these elements rounds out the nutritional profile without requiring significant effort.
A sandwich plus fruit plus coffee creates a complete breakfast in under five minutes of actual work time.
Regional Availability and Purchasing Options
Jimmy Dean breakfast sandwiches are available at virtually every major grocery chain across the United States, but selection varies by region and store size.
Where to Buy:
- Walmart (widest selection, usually 8-12 varieties)
- Target (good selection, 6-10 varieties)
- Kroger and affiliated stores (varies by location)
- Safeway/Albertsons chains (moderate selection)
- Costco and Sam’s Club (bulk options, limited varieties)
- Regional grocery chains (vary significantly)
- Convenience stores (limited selection, usually 2-4 varieties)
Warehouse stores offer the best per-unit pricing but require buying larger quantities. A typical Costco pack contains 8-12 sandwiches.
Some varieties sell exclusively at specific retailers. Walmart often carries varieties not available at Target, and vice versa.
Online grocery delivery through Instacart, Amazon Fresh, or store-specific services provides access without leaving home, though per-sandwich costs increase slightly with delivery fees.
The History Behind Jimmy Dean Breakfast Products
Understanding the brand adds context to why these sandwiches dominate the frozen breakfast category. Jimmy Dean, the country music singer turned sausage mogul, founded the company in 1969.
The breakfast sandwich line came later, capitalizing on America’s growing desire for convenient morning meals as dual-income households became the norm.
The company’s focus on pork sausage as a primary protein differentiates it from competitors who often lead with bacon or generic “sausage” that lacks distinctive flavor.
Hillshire Brands acquired Jimmy Dean in the 1980s, and Tyson Foods later acquired Hillshire Brands, but the Jimmy Dean brand maintained its identity through these ownership changes.
The brand’s longevity in a competitive market speaks to consistent quality and successful marketing that positions these products as both convenient and authentically American.
Making the Choice: Are These Right for You?
These sandwiches aren’t for everyone, and that’s okay. Determining whether they fit your lifestyle requires an honest assessment of priorities.
They Make Sense If You:
- Value convenience over cost savings
- Have limited cooking time or skills
- Need portable breakfast options
- Want consistent results without thought
- Prefer moderate effort for decent quality
- Have freezer space for storage
They’re Not Ideal If You:
- Have serious dietary restrictions (high sodium, specific allergens)
- Prioritize minimal food packaging
- Want maximum nutritional value per dollar
- Have time and skills for from-scratch cooking
- Prefer fresh over frozen foods
- Follow strict clean-eating protocols
There’s no judgment in either direction. Frozen breakfast sandwiches serve a purpose in modern life, even if they’re not an everyday solution.
Many people keep a few in the freezer for emergency backup when the morning goes sideways, using them as insurance against skipping breakfast entirely.
Professional Tips from Restaurant Industry Veterans
People who’ve worked in food service often approach reheating frozen foods differently than home cooks. Here are insights from that world.
Pro Tip #1: Temperature Recovery
Commercial kitchens obsess over “temperature recovery” – how quickly cooking equipment returns to target temperature after cold food is added. At home, this means not overcrowding your cooking surface and allowing equipment to maintain proper heat.
Pro Tip #2: Staging Your Prep
If making multiple sandwiches, stagger start times by 30 seconds rather than cooking simultaneously. This prevents overwhelming your microwave or oven and ensures each sandwich gets adequate attention.
Pro Tip #3: Visual Cues Matter
Learn to recognize what a properly heated sandwich looks like. The cheese should show slight melting around the edges. Bread should have minimal moisture darkening. Steam should be visible when unwrapped.
Pro Tip #4: Resting Time Isn’t Optional
Commercial kitchens build resting time into their processes. At home, people skip this step constantly. The resting period isn’t filler time – it’s when final temperature equalization happens.
Creating Your Own Assembly Line System
For families preparing multiple sandwiches, an assembly line approach maximizes efficiency and consistency.
Assembly Line Steps:
- Remove all sandwiches from packaging
- Wrap each in paper towels (for microwave) or foil (for oven)
- Label each if preparing different varieties
- Cook in batches based on equipment capacity
- Set a timer for each batch
- Stage finished sandwiches on plates for standing time
- Add customizations once all sandwiches have rested
This system works especially well for weekend family breakfasts or when hosting guests. You can prepare 4-6 sandwiches with about the same effort as making one.
The key is staying organized and not mixing up different varieties with different cooking times. A simple label or arrangement system prevents confusion.
Advanced Techniques for Enthusiasts
Once you’ve mastered basic preparation, these advanced techniques push quality even further.
The Double-Wrap Method:
Wrap the sandwich in a paper towel, then place the wrapped sandwich in a microwave-safe container with a lid slightly ajar. The container creates an additional steam chamber while the paper towel manages moisture. Results are remarkably consistent.
The Reverse Sear:
Start in the microwave to defrost and partially heat (1 minute on 50% power), then finish in a hot skillet for 30-45 seconds per side. You get microwave speed with skillet texture.
The Steam Then Crisp:
Microwave using standard instructions, then transfer to a preheated 400°F oven for 2-3 minutes. This crisps the exterior while maintaining the evenly heated interior from the microwave.
The Separated Heating:
Completely disassemble the sandwich before cooking. Heat the egg/meat/cheese component separately from the bread. Toast bread separately. Reassemble with fresh condiments. This takes longer but produces results closest to fresh-made.
These techniques require more effort but deliver notably superior results when you want to impress or simply treat yourself.

The Verdict on Jimmy Dean Breakfast Sandwich Instructions
Jimmy Dean breakfast sandwich instructions aren’t complicated, but they reward attention to detail. The difference between following the package directions mindlessly and applying the techniques in this guide is the difference between edible and enjoyable.
Microwave preparation works fine for busy mornings when convenience trumps everything else. Oven methods deliver better quality when time allows. Air fryers and stovetop approaches offer middle-ground solutions that balance speed and quality.
The “best” method depends entirely on your priorities that particular morning. Keep your freezer stocked, master two or three different preparation techniques, and you’ll have a reliable breakfast option that takes minimal effort while delivering consistent results.
These sandwiches won’t replace a fresh-made breakfast from quality ingredients, but they serve their purpose admirably. Sometimes convenience matters more than perfection.
Frequently Asked Questions
How long should I microwave a Jimmy Dean breakfast sandwich?
Microwave for 1 minute on defrost or 50% power, then 50-65 seconds on high power, followed by 1 minute standing time. The total process takes about 3 minutes. Adjust based on your microwave’s wattage.
Can you cook Jimmy Dean breakfast sandwiches in the oven?
Yes, oven cooking produces superior results. Wrap the sandwich in foil and bake at 350°F for 20-25 minutes. The longer cooking time creates better texture and more even heating than microwave methods.
Do you have to defrost Jimmy Dean sandwiches before cooking?
No, cook them directly from frozen. The instructions account for frozen starting temperature. Defrosting beforehand can create food safety concerns and doesn’t improve results.
Why is my Jimmy Dean sandwich cold in the middle?
Cold centers result from cooking at too high a power without adequate defrost time. Use 50% power or defrost setting for the first minute, which allows gradual heating from outside to center.
How do you keep Jimmy Dean sandwiches from getting soggy?
Always wrap in a paper towel when microwaving to absorb excess moisture. Don’t seal foil too tightly when using oven methods, as trapped steam makes bread soggy.
Can you air fry Jimmy Dean breakfast sandwiches?
Absolutely. Air fryers work excellently. Separate components and cook at 350°F for 8-10 minutes, then reassemble. This method produces crispy bread and evenly heated fillings.
Are Jimmy Dean breakfast sandwiches already cooked?
Yes, all components are fully cooked. Reheating brings them to a safe serving temperature. This is why some preparation methods work quickly – you’re reheating, not cooking from raw.
How many calories are in a Jimmy Dean breakfast sandwich?
Most varieties contain 410-460 calories per sandwich. Turkey sausage options have slightly fewer calories (around 380-410) while croissant varieties tend toward the higher end.
Can you make Jimmy Dean sandwiches healthier?
Add fresh vegetables like spinach, tomato, or avocado after heating. Choose turkey sausage varieties over pork. Pair with fresh fruit instead of hash browns for a more balanced meal.
What’s the best Jimmy Dean breakfast sandwich?
Preferences vary, but the Sausage, Egg & Cheese Biscuit consistently ranks highest in consumer reviews for taste and ease of preparation. The biscuit bread heats more evenly than croissants.
How long do Jimmy Dean sandwiches last in the freezer?
When stored properly at 0°F or below, they maintain quality until the date printed on the package, typically 6-9 months from purchase. They remain safe indefinitely when frozen, but quality degrades over time.
Can you eat Jimmy Dean sandwiches cold?
Technically, yes, since they’re precooked, but the texture and flavor are significantly better when properly heated. Cold egg and sausage aren’t appetizing for most people.
Do Jimmy Dean sandwiches have real eggs?
Yes, they contain real eggs, though they’re processed differently than fresh eggs you’d crack at home. The egg patty is designed for consistent reheating results.
Can you prepare Jimmy Dean sandwiches the night before?
You can oven-bake them the night before, refrigerate overnight, then briefly reheat in the microwave (45-60 seconds) the next morning. This provides oven quality with microwave morning speed.
What temperature should Jimmy Dean sandwiches reach internally?
The USDA recommends reheating precooked foods to 165°F internal temperature for food safety. Use an instant-read thermometer inserted into the center to verify.
SUGGESTED POST >> 13+ Best Toddler Breakfast Ideas for Daycare: Healthy Ideas
Discover more from Meal Prep Insider
Subscribe to get the latest posts sent to your email.